Showing posts with label API. Show all posts

Wednesday, August 12, 2015

Using Facebook's Graph API to Count Shares

Have you shared today's comic yet? Getting it shared at least 100 times on Facebook is the only way to unlock the action in the last frame. Well, it also has to be Wednesday. So share it 100 times today or wait until next week to try again.
Bombs don't look like this in real life.
This depiction is illogical.

The joke is that the frogs have discovered a logic bomb in a computer, and logic bombs only go off when their criteria are met. The criteria of this particular one include Facebook shares and the day of the week. Really it's designed to get me lots of attention on social media, but there is a joke in it.

Now to the good part...how does it work? The day-of-the-week part is easy, but checking the number of Facebook shares was slightly more involved. I used the Facebook Graph API.

There is a ton of stuff you can do with it, but for now I'm keeping it simple. I wanted to be able to check how many shares a given URL has. And you ask yourself, "Why doesn't he just look at that little number down below every comic?" Well, I'll tell you. That's a Facebook widget that functions by embedding an iframe in the page. I can't really check what it's doing from my own code. I had to write some server-side code to interface directly with Facebook.

Since share information is public, you can access it just by hitting a Facebook URI with any valid access token.

https://graph.facebook.com/v2.4/?access_token=<your-token>&id=<object-id>

The object id is just the URL that you want to check shares on. For me, it's something like http://amphibian.com/205. The tricky part is getting an access token. The easiest way to do it is to create a Facebook App and use the permanent access token associated with it. Sign up as a Facebook developer, and then create a new web app. After you have a web app set up, go to the Tools & Support menu and select Access Token Tool. You should then see a pair of tokens for your app, a User Token and an App Token. The App Token is the one you want because it never expires.

DO NOT share these tokens with anyone, or put them in client-side code! DO NOT! It will give anyone permission to perform actions as your application. I put the App Token in a server-side config file that is NOT committed to source control (at least not in a public repo).

Once you have both an access token and an object id (of something that's been shared at least once), hit the URL and you should get a JSON response.

Something like this:

{
  "og_object": {
    "id": "1128024717211703",
    "description": "Amphibian.com webcomic for Monday, 10 August 2015",
    "title": "Crowdfunding",
    "type": "website",
    "updated_time": "2015-08-10T08:18:03+0000",
    "url": "http://amphibian.com/205"
  },
  "share": {
    "comment_count": 0,
    "share_count": 12
  },
  "id": "http://amphibian.com/205"
}

I just parse that response and get the number of shares. I am doing this from a Node application, and just like when I used the Imgflip API to make memes, I use the convenient request module:

app.get("/shares/:id", function(req, res, next) {

    var comic = req.params.id;
    var token = "your-token-here";

    request({
        uri : "https://graph.facebook.com/v2.4/",
        qs : {
            access_token : token,
            id : "http://amphibian.com/" + comic
        }
    }, function(error, response, body) {

        if (!error && response.statusCode == 200) {

            var data = JSON.parse(body);

            res.setHeader("Content-Type", "application/json");
            res.send({
                id : data.id,
                shares : data.share.share_count
            });

        } else {
            next(error);
        }

    });

});

Again, I must stress that this code has to be done on the server side, since you don't want to give clients access to your App Token. When the client JavaScript has to check if it's ok to set off the cartoon bomb, I access a URL on my server that essentially proxies the request to Facebook. The code example above sets up a route /shares/:id that will give the share data for any comic to a client without exposing my App Token to the world.

Not too difficult. I just hope my plan is successful and the comic gets lots of shares. Trust me, it's worth it. Go on, check it out. It's also got a Zero Wing reference in there (which you can see before it's shared).

Amphibian.com comic for 12 August 2015

Friday, July 31, 2015

Make Memes via API Calls

In today's comic the frogs are recycling pictures into memes, and by clicking on the meme in the last frame you can create your own frog meme. You just type in your own text and your personalized meme appears. You can even share it.

I don't want to get into a debate about how the sharing of memes has destroyed what remains of our humanity - it's just a comic about frogs. The interesting thing is how I was able to find a meme generation API that I could work with to make this comic possible.

My first attempt at this used memegenerator.net. It's a very popular meme site. They have a JSON API and there are even some modules for Node.js that interface with it. That all sounded good. I tried out the node-meme module and it worked - for all the read methods. Once I tried to create a meme with it I was informed by an error code that I needed valid login credentials.

No problem! I'll just register for an account.

Nope.
Or not. Apparently, account registration has been unavailable for quite some time. All attempts at it result in a rather unintelligible error message. There goes that plan!

After some more searching I found Imgflip.com. They have both a meme-generation API and functioning account registration! Yeah!

To make the comic work the way I intended, I needed to make all the memes from my server and then just update the browser with the Imgflip URL. This prevents everyone who uses the comic from having to get their own account, but it makes things a little more complicated for me. I essentially had to set up a meme-generation proxy. Your browser POSTs data to my server, my server POSTs data to Imgflip, Imgflip generates a meme and tells my server the URL, and finally my server tells your browser the URL.

This also required me to do something I haven't done a lot of before - use the Node http client. Sure, I've done simple things with it in the past, but the out-of-the-box features make it a bit difficult to use when you want to access a REST web service.


So I also started using the request module. It greatly simplifies working with HTTP(S) requests in Node. Here is an example of how I use it to interact with Imgflip's API:

var request = require("request");

var formData = {
    template_id : "41754803",
    username : "user",
    password : "passwd",
    text0 : "i look displeased...",
    text1 : "but i have no idea what's going on"
};

request.post("https://api.imgflip.com/caption_image", {
    form : formData
}, function(error, response, body) {

    var meme = JSON.parse(body);

    if (!error && response.statusCode == 200) {
        console.log(meme.data.url);
    }

});

Simple, right? The first parameter to request.post is the URL.

The second is what to POST. In this case, I want to POST a form, specifying the form data as an object. Imgflip only accepts form data as input, and every POST must include your username and password. You get those by registering on their site. The template_id form field is the id number for the meme image you want to use. If you upload your own meme template images, you can find the id numbers on template details page linked from your account. The text0 field is the text for the top of the image, and text1 is for the bottom.

The third parameter is the callback function for when the POST completes. This function gets an error (if there was one), the response object for checking the status code (and other stuff if you want), and the body of the response. In the case of the Imgflip web service, I know the body will be JSON. In this example I just log the meme image URL.

That is much simpler than doing it the purely native way. I recommend the request module if you need to do any kind of REST API access and there's no custom client available.

Now the fun begins: frog memes for everyone!

Amphibian.com comic for 31 July 2015

Friday, December 5, 2014

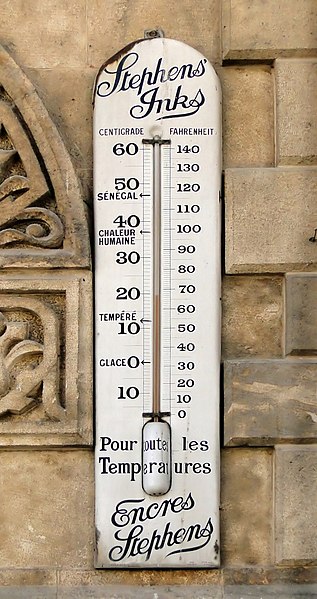
Your Internet Thermometer

Photo by Bernard Gagnon
It's amazing what access to the Internet on phones has done to us. When I wake up in the morning, I look at my phone to check the outside temperature. I remember when I was a kid and we had to use antiques like thermometers stuck on the outside of our windows!

In today's comic, the frog is trying to get the body temperature reading from another frog. He fails to realize that frogs, being ectotherms, will basically have the same body temperature as that of their environment. His phone shows him (and you, the reader of the comic) the actual temperature from my town here in central Pennsylvania. Look at the comic today and you'll see today's temperature. Come back in 6 months and you'll see a warmer temperature (I hope). Whatever temperature it is here when you load the page, that's what you'll see.

Getting weather data for my comic is not difficult. I basically do the same thing that the weather app on your phone is doing - accessing a server somewhere that has been collecting data from weather stations around the country and getting the latest information for a certain location. I have used both Weather Underground and OpenWeatherMap to get data, as both have APIs that anyone can use. In the case of my comic, I wrote a simple module for Node that I use to manage the API calls.

var http = require('http');

module.exports = function(conf) {

    var currentTemp = 50;  // start with some reasonable value

    var apiKey = conf.weatherApiKey || "";
    var location = conf.location || "";

    function pullWeatherData(cb) {

        // OpenWeatherMap
        var url = "http://api.openweathermap.org/data/2.5/weather?id="
                + location + "&units=imperial&APPID=" + apiKey;

        // Weather Underground
        //var url = "http://api.wunderground.com/api/" + apiKey
        //        + "/conditions/q/" + location + ".json"; 

        http.get(url, function(res) {

            var wData = "";
            res.on("data", function(chunk) {
                wData += chunk;
            });
            res.on("end", function() {
                try {
                    var data = JSON.parse(wData);
                    cb(null, data);
                } catch (e) {
                    cb(e);
                }
            });

        }).on("error", function(e) {
            cb(e);
        });

    }

    function weatherTimer() {

        pullWeatherData(function(err, data) {
            if (err) {
                console.log(err);
            } else {
                try {

                    // OpenWeatherMap
                    if (data.main.temp) {
                        currentTemp = data.main.temp;
                    }

                    // Weather Underground
                    //if (data.current_observation.temp_f) {
                    //    currentTemp = data.current_observation.temp_f;
                    //}

                    console.log("Setting current temp to " + currentTemp);

                } catch (e) {
                    console.log("Unable to update temp");
                    console.error(e.stack);
                }
            }
            setTimeout(weatherTimer, 1800000); // call again in 30 minutes
        });

    }

    weatherTimer(); // run now, and then every 30 minutes

    return {
        temperature: function() {
            return currentTemp;
        }
    };

};

The goal of this module is to give me access to the current temperature value and update that value automatically on a timer. Temperature doesn't usually change that quickly so every 30 minutes is fine for my application.

There are really only two functions - one that calls the API to get the data and the timer that asks for new data and updates the temperature. In my code above, I show it using the OpenWeatherMap API with the Weather Underground stuff commented-out, in case you want to try that one as well.

The first function I called pullWeatherData. It simply calls http.get for whichever service you want to use and reads the response stream, in JSON format, into a string which is parsed into an object at the end. I had to make sure error conditions were handled gracefully, because when you call external APIs you sometimes get garbage back. That's the point of the try/catch around the JSON.parse call - the response might not actually be JSON (it could be a plain text HTTP 500 page, for example) and you don't want to crash your whole app. So if there is any kind of error, the callback function given to pullWeatherData is called with the error as the one and only parameter. In the case of a successful call and parse, the callback function is called with a null as the first parameter to indicate no errors and the weather data object as the second parameter. The exact format of this object will depend on which service you called.

The weatherTimer function simply calls pullWeatherData and then does something with the data before setting a timeout for calling itself again in 30 minutes. All it really does with the data is take the temperature value out of it and store it in a variable. If everything works, that variable will be automatically updated every half hour.

After defining these two functions, my module calls weatherTimer in order to get the data for the first time and start the timer for the next call. The return value is an object with a function simply called temperature which will return the current value of the temperature variable. Here's an example of how the module would be used in an app:

var express = require("express");
var app = express();

/*
 * OpenWeatherMap uses their own location ids.
 * Id 5184309 is near Reedsville, PA.
 * 
 * Weather Underground can use ZIP codes.
 * ZIP 17084 is Reedsville, PA.
 */
var weather = require("./weather")({
    weatherApiKey: "your_key_here",
    location: "5184309"
});

app.get("/", function(req, res, next) {
    res.send("weather demo");
});

app.get("/temp", function(req, res, next) {
    res.send("current temperature is: " + weather.temperature() + " deg F");
});

// ------------ start listening
var server = app.listen(3000, function() {
    console.log("listening on port %d", server.address().port);
});

Just like the comic, this sample app will tell you the temperature here in Reedsville if you point your browser at the /temp path. As you can see, it's cold in Reedsville as I write this.


If you want, you could modify this module to get different weather data or more data and store it in a more complex object. You could really just store off the entire response object and access different values each time. You might even apply this pattern to other non-weather APIs as well. Be creative!

Amphibian.com comic for 5 December 2014